
How to Install GRP Pipe: Troubleshooting Common Installation Issues
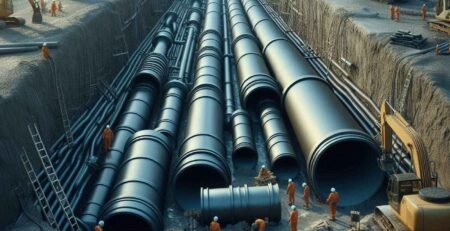
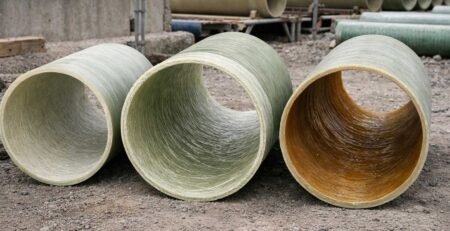
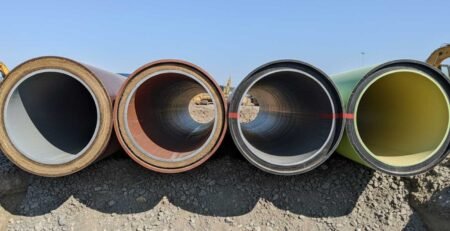
Ever wondered why GRP pipe installation is counted as one of the most crucial steps in pipeline engineering? GRP pipe is a blend of glass fibers and resin matrix manufactured by filament winding or centrifugal casting. With a composite nature, GRP pipes act as lightweight, corrosion-resistant pipelines for water, sewage, and chemical transmission. GRP pipe performance depends on how well they are installed.
This guide vividly clarifies how a proper GRP pipe installation will provide engineers and contractors with a durable, integrated jointing and with a piping system with no deformation.
How are GRP Pipes Prepared for The Installation Process?!
Before going through the GRP pipe installation, several inspections, such as planning and site evaluation, equipment, and required methods, should be considered to achieve a reliable piping system lasting over decades.
Site Inspection and Planning
Before getting into the central installation part, the place should be checked for environmental and structural properties such as terrain, soil type, potential obstacles, or groundwater levels. This aids engineers in identifying the best method. Here are some steps for proper planning:
- First, recognizing the existing obstacles, such as tree roots or complicated wire networks.
- Second, design the pipeline to reduce the need for bending and improve the flow.
- Third, adapt the pipe specification to the site requirements through manufacturer consultation.
- Last, create the layout plan, including joint and trench locations.
Required Tools and Equipment
For a successful installation, specific machinery and tools are required. Here are the most commonly used tools and equipment in GRP pipe installation:
| Category | Tools/Equipment | Purpose |
|---|---|---|
| Excavation | Backhoes, Excavators | Digging trenches for GRP pipe trench preparation. |
| Lifting | Cranes with Fabric Slings | Safe GRP pipe handling and storage. |
| Alignment | Laser Levels, String Lines | Precise pipe alignment. |
| Jointing | Jacks, Pullers, Heating Blankets | Enabling GRP pipe jointing methods (e.g., elastomer or adhesive joints). |
| Compaction | Vibratory Plates, Rammers | Compacting GRP pipe bedding and backfill. |
| Safety Gear | Hard Hats, Gloves, Safety Vests | Ensuring worker safety during GRP pipe installation. |
Safety Permits And Work Method Approvals
In processes that contain excavation and high-pressure fluids, safety considerations are essential via an outlined work method statement (WMS) including risk assessments for tasks like trench excavation, pipe lifting, and jointing methods.
- Step-by-step instructions for both underground and above-ground installations.
- Personnel responsibility determination from managers to workers.
- Preparing safety tools for further mishaps and measurement tools.
- Checklists for tools, equipment, project specifications, and installation stages.
By managing the points above, contractors are ready to dive into the process.
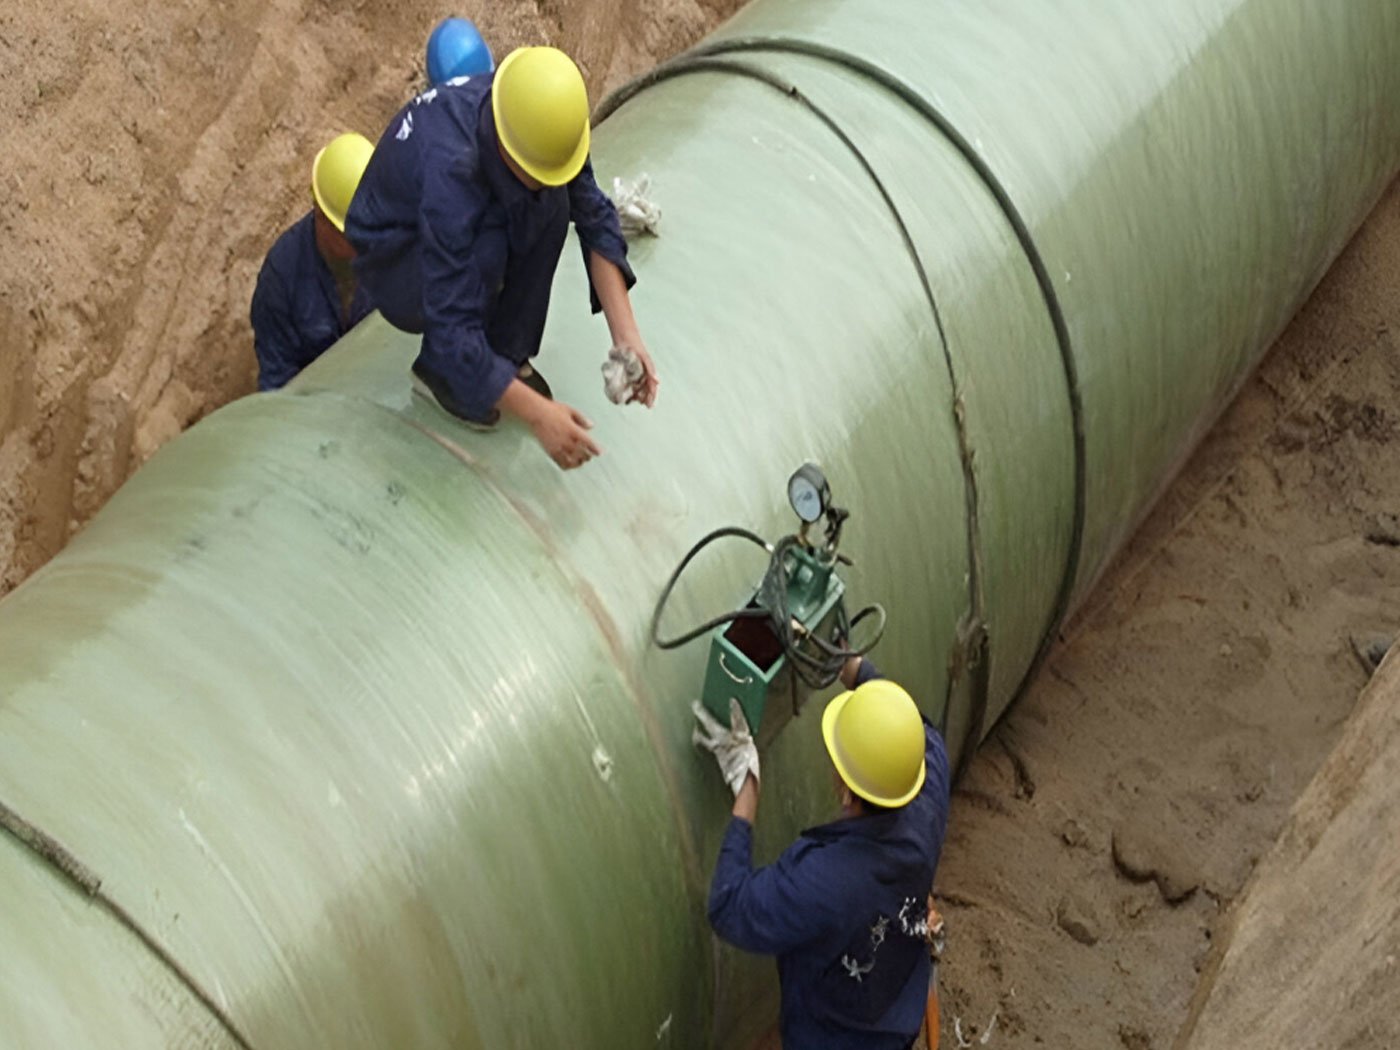
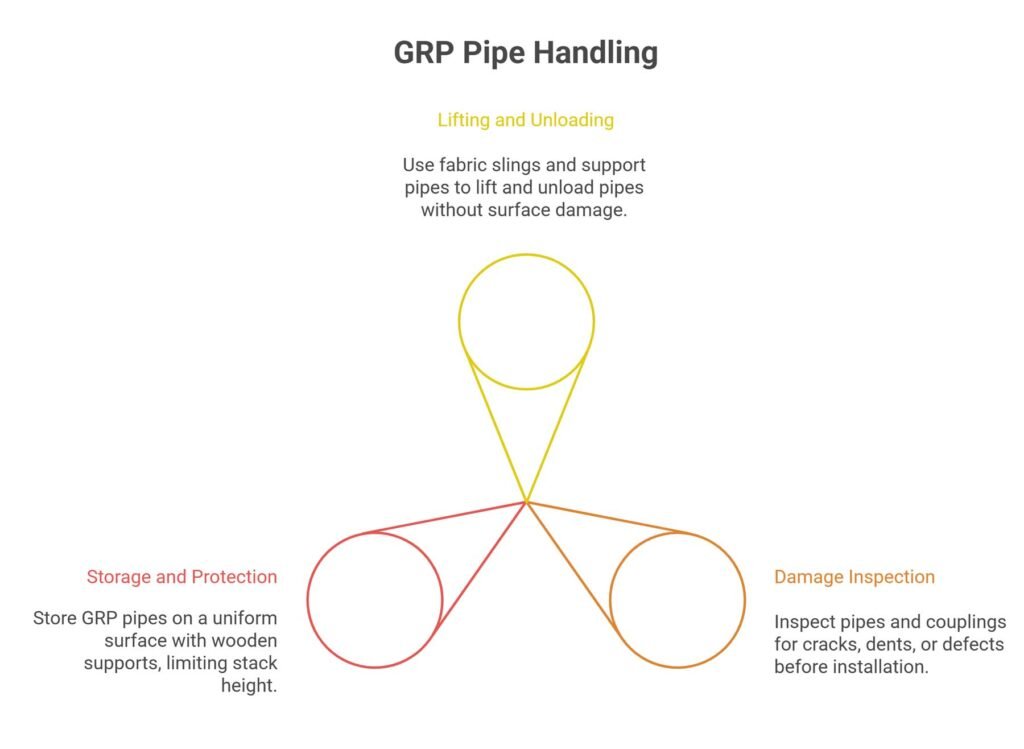
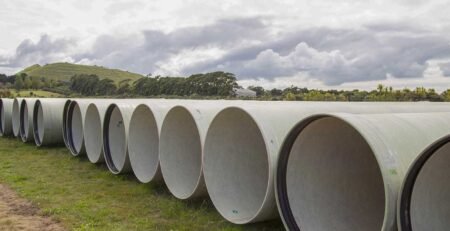
Handling, Transport, and Storage for GRP Pipe Installation
Once the planning for the installation is verified, it’s time to transport the pipes to the site. Also, storage and handling of the GRP pipes due to their lightweight and in some cases their special length can be challenging.
Lifting and Unloading Best Practices: Fabric slings and support pipes (typically at 2-2.5m intervals) can help workers to lift and unload pipes, including no surface damage.
Damage Inspection Before Installation: Check all pipes and couplings for cracks, dents, or defects to avoid any further leaks during hydrostatic testing or pipeline functioning.
Storage, Ground, and Coupling Protection: Storage of GRP pipes should include no rock, a uniform surface, and wooden supports. Be careful to limit stack height to 1.5m (or two pipes for diameters ≥800mm) to avoid pressure damage.
Trench Design & Bedding
In underground installation methods, fundamental components like bedding and trenching require several standards and considerations based on grain size or bedding thickness.
Standard Trench Dimensions: For an efficient workplace of installation, the trench size should be designed based on its width and depth. For instance, the trench depth contains a minimum cover of 0.8-1m (or as per design specifications, e.g., 1m for traffic load zones).
| Pipe Diameter (DN) | Trench Width (L) |
|---|---|
| ≤ 400mm | DN + 400mm |
| 400 < DN ≤ 1000mm | DN + 600mm |
| > 1000mm | DN + 800mm |
Bedding Material Selection: Bedding materials are classified as SC1 to SC4 based on grain size and composition. Through the table below, engineers can choose the right material; for example, SC3 and SC4 may need more effort for compaction.
| Material | Description |
|---|---|
| SC1 | Crushed stone, <15% sand, max 25% passing ASTM 200 sieve |
| SC2 | Clean coarse materials, <12% fine grains |
| SC3 | Coarse materials, ≥12% but <70% fine grains |
| SC4 | Fine-grained materials, >70% fine grains |
Bedding Thickness: For a reliable and long-term performance of GRP pipes, bedding layers should be aligned with the soil type and bedding materials.
In unstable soils, to add support, concrete or trenching deeper is recommended, while in stable soils with SC3-SC4 use hand rammers to compact the bedding up to 70%. (Source: ScienceDirect)
Pipe Placement in Trench Stage of GRP Pipe Installation
As a central step in GRP pipe installation, pipe placement requires alignment techniques, careful placement, and the use of temporary support and vibration control during this stage.
Alignment Techniques
Using string lines or laser levels to maintain the proper centerline and slope when placing pipes in trenches is one way to ensure accuracy when installing GRP pipe.
Safe Lowering of Pipe Sections
To successfully install GRP pipe, use cranes equipped with fabric slings to lower the pipes into the trench. This will ensure that the pipes are positioned correctly on the prepared GRP pipe trench preparation bed and prevent damage.
Flotation Control and Temporary Supports
Use temporary supports, such as sandbags, to stabilize GRP pipes during installation, and use flotation control techniques, like weights or dewatering, in areas with high water tables to stop movement.
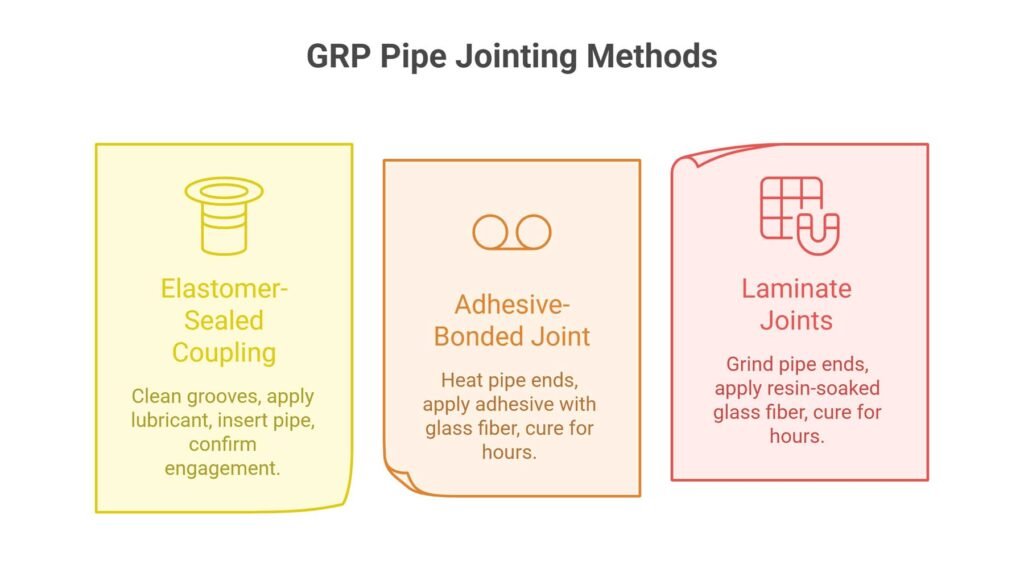
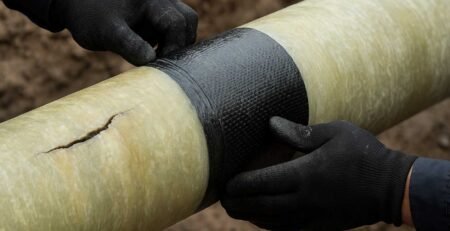
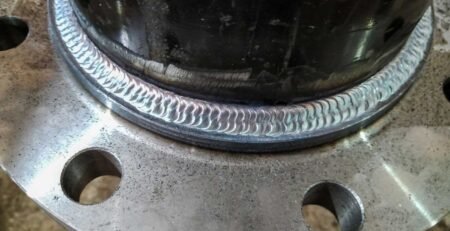
Jointing Methods for GRP Pipe Installation
In order to ensure pipeline integrity during GRP pipe hydrostatic testing and a leak-free, long-lasting GRP pipe installation process, proper GRP pipe jointing techniques are crucial. This section describes the lamination process for buried pipes, the adhesive-bonded joint process, and the installation of elastomer-sealed couplings.
Installation of Elastomer-Sealed Coupling
To get rid of debris, clean the coupling grooves and pipe ends. After applying lubricant and positioning the elastomer gasket with protrusions outward, insert the pipe into the coupling using hydraulic jacks or pullers. For a secure elastomer coupling GRP pipe, confirm complete engagement with no gaps.
The Adhesive-Bonded Joint Process
Apply adhesive with glass fiber reinforcement after heating the pipe ends to 40–60°C with a heating blanket. Shave the ends of the pipes to create a smooth surface. For high-pressure systems, cure for 4–8 hours to produce a strong GRP pipe adhesive joint.
Laminate Joints for Buried Pipes
In order to strengthen joints in high-load or unstable soil conditions and improve the GRP pipe lamination process, grind pipe ends, apply layers of glass fiber soaked in resin, and allow them to cure for 4–8 hours.
Compaction and Backfilling
GRP pipes are supported, and deflection is reduced by proper backfilling. To maintain alignment, apply backfill in 100–300 mm layers on both sides of the pipe using SC1 or SC2 materials.
- Backfill Layers: Evenly backfill all the way to the pipe crown. The best stability is provided by coarse sand or crushed stone.
- Soil Compaction: According to Scribd, for coarse soils (SC1–SC2), use vibratory plates; for finer soils (SC3–SC4), use hand tools. Don’t put large equipment over the pipe too soon.
- Crown & Haunch: In order to prevent surface load stress, compact the crown zone and the haunch zone for side support.
- Depth of Cover: To safeguard the pipe during final construction and testing, make sure there is 0.8–1 m of cover prior to surface compaction—1 m in traffic zones.
How To Avoid Ovalization and Deflection in Long-Term Performance?
For GRP pipes to keep their shape, flow characteristics, and joint integrity during their long lifespan, ovality and vertical deflection must be controlled.
Limits of Deflection
Under load, GRP pipes may deform a little, but too much change can cause damage over time. The permitted vertical deflection for pipes 300 mm or larger is 5%. It is restricted to 4% for smaller pipes.
| Pipe Diameter (DN) | Maximum Deflection Limit |
|---|---|
| ≥ 300mm | 5% of diameter |
| < 300mm | 4% of diameter |
Assessing Deflection
24 to 48 hours after backfilling, use a caliper or deflection gauge to measure the vertical deflection. Measure several times, usually every three meters. The formula below is used for deflection:
(Original Diameter – Measured Diameter) ÷ Original × 100
How Can Over-deflected or Misaligned Sections Be Addressed During GRP Pipe Installation?
Excavate the area and recompact bedding with appropriate material, such as SC1 or SC2, if deflection is too great. Use alignment tools and slings to carefully realign the pipe. Replace the pipe if it is cracked or permanently distorted.
Thus, proper performance, joint integrity, and success during hydrostatic testing are achieved by quick correction.
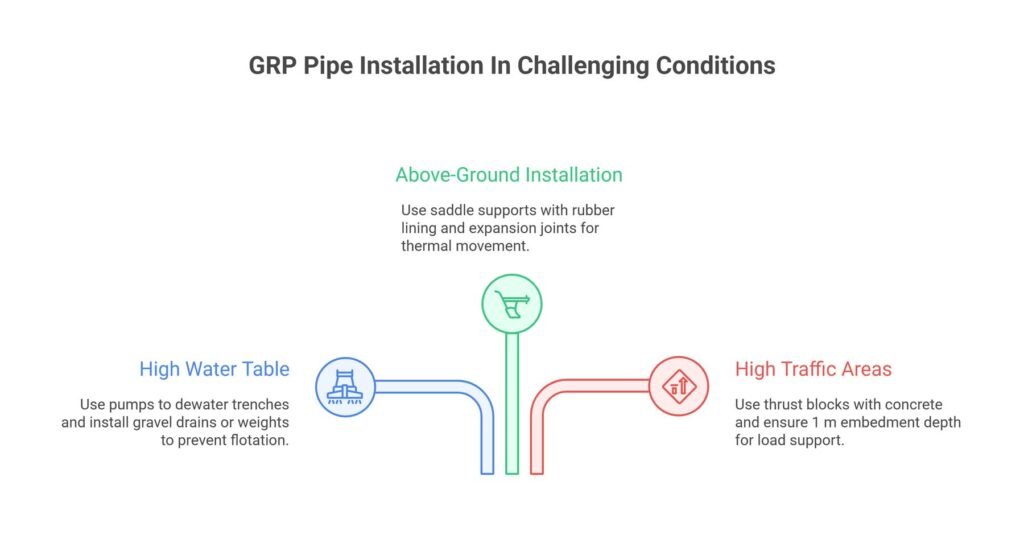
Installation In Challenging Conditions: Specialized Use Cases
Special circumstances require specific methods for the installation of GRP pipes. Here are three particular use cases of GRP pipes requiring careful installation:
- High Water Table: When installing GRP pipes beneath the water table, use pumps to dewater trenches while maintaining water 30 cm below the pipe. To ensure stable GRP pipe bedding and backfill, install gravel drains or use weights to stop flotation.
- Above-Ground Installation: Use saddle supports with a 150° arc and a 4mm rubber lining, spaced three to six meters apart, to support above-ground GRP pipes. To control thermal movement and preserve alignment, add expansion joints.
- Areas with High Traffic: Use GRP pipe thrust block design with concrete (1.5 safety factor) at bends in traffic areas, and make sure the embedment depth is 1 m to support loads.
Inspection and Testing: Hydrostatic testing, QC Checklist, and Visual Checks
Testing and inspection guarantee that the GRP pipe installation process produces a dependable pipeline. These procedures confirm that the structure is sound and that design guidelines are being followed.
How Does Hydrostatic Testing Work?
To perform hydrostatic testing on GRP pipes, fill the pipeline with water, remove air through vents, and pressurize for two hours at 1.5 times the design pressure. To ensure system integrity, keep an eye out for leaks or pressure drops. (Source: What Is Piping)
Visual Checks: Deflection, Unevenness, or Gaps in The Joint
Check for gaps in GRP pipe jointing techniques, use lasers or string lines to confirm alignment, and use calipers to check the ovality limits (4–5% deflection) of GRP pipes to make sure they are the right shape.
Checklists for Quality Control Section
Verify 70% backfill density, proper alignment, and tight joint sealing using a GRP pipe installation checklist. Record the findings for troubleshooting GRP pipe installation.
Troubleshooting During Installation of GRP Pipe
In the GRP pipe installation, some common troubles may appear. To prevent these mishaps, there are some reliable solutions below:
1. How To Fix Leaks, Deflection, or Flotation?
Incorrect gasket placement is frequently the cause of joint leaks in elastomer-coupling GRP pipes. Poor bedding is indicated by excessive vertical deflection of GRP pipes (greater than 4-5%). In regions with high water tables, flotation happens as a result of insufficient dewatering.
2. How to Correct Compaction or Alignment Issues?
For accuracy, realign pipes with string lines or lasers. In order to provide adequate support, excavate and recompact GRP pipe bedding and backfill to 70% density.
3. When Should Pipe Sections Be Removed and Replaced?
In order to preserve integrity, replace pipes in accordance with the manufacturer’s instructions if cracks or significant deformation are found.
Final Wrap-Up
Preparation, trench design, pipe placement, jointing, backfilling, and testing are all steps in the GRP pipe installation process. Observe the GRP pipe installation checklist, paying attention to the hydrostatic testing and compaction requirements. To guarantee performance and durability and reduce problems like joint failures or GRP pipe ovality limits, follow manufacturer-specific instructions and industry standards.
FAQs
1- What is the best way to store GRP pipes?
Store on a smooth surface with wooden supports, protect ends, and stack carefully to avoid cracks or deformation.
2- How to prevent deflection in GRP pipes?
Use the right trench dimensions, align pipes precisely, avoid early surface loading, and make sure that bedding and backfill are properly compacted (at least 70% density) to prevent deflection in GRP pipes.
3- What is the purpose of hydrostatic testing?
To perform hydrostatic testing on GRP pipes, fill the pipeline with water, remove air through vents, and pressurize for two hours at 1.5 times the design pressure. To ensure system integrity, keep an eye out for leaks or pressure drops.
Leave a Reply